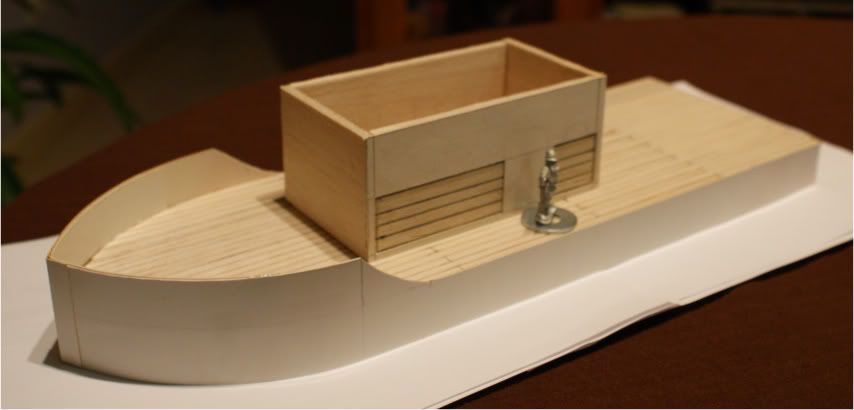
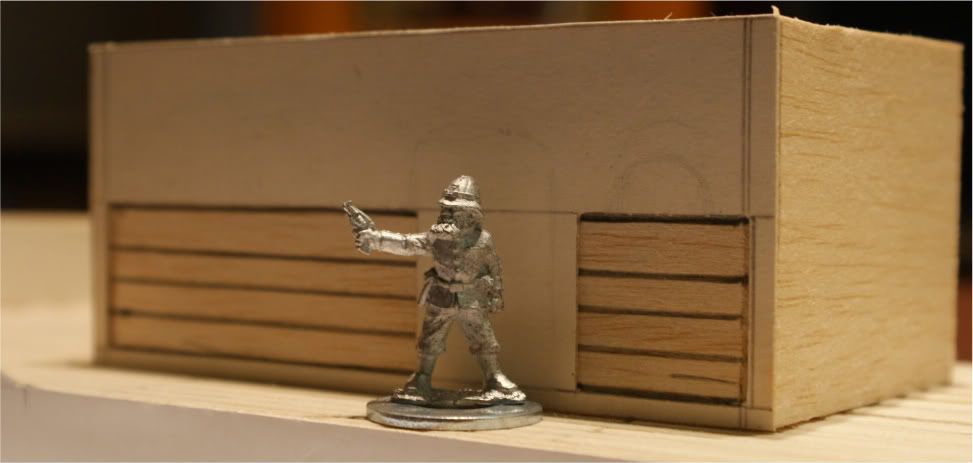
Just a small update for this evening. I am nowhere near having this finished this weekend (it is Sunday evening now and time for bed). However, some nice progress was made tonight courtesy of the lovely Painting Princess. However, I haven't got any photos.
What I did take were some photos of the things I'll be using to liven up the build - accessories mostly. I thought it would be a nice bit of eye candy while you're waiting for a real update.
First up, the bits box. Followed by some bags of Reviresco gear (portholes and rails) and some close ups of the Faller plastic crates and Boot Hill goodies.
And there was one slight modification to the ship. I have now placed the larger cabin at the back, and the smaller cabin to the fore of the ship. This will allow me to play around with a boiler and staircase without interfering with my plans for the top-deck big gun/cargo/pavillion area.
I may just make a small room to accomodate the pipe, or have an exposed boiler. Still tossing the idea around... maybe you can give me some suggestions?
And for another diversion, I have put together a small expeditionary force that will (hopefully) use the ship for their travels through the Congo and beyond.
1 x Hero (he's in the picture)
10 x Askaris (Trained, Leader)
8 x Tribal musketmen (Raw)
10 x Tribal warriors/cannibals (Raw, Leader)
1 x Gatling gun with 3 crew (Trained)
That's the plan anyway... they are going to be Belgians, at this stage. The only problem is that my Askari unit is only half Blegian models, the others are generic. So we'll see... later. Much later.
Goodnight, everybody!
Sunday, February 27, 2011
Tuesday, February 22, 2011
Colonial steamer pt. 6 - Toot toot.
Just a small update for now. I have put together the basis for where the ship's wheel and other gadgets will go (I have no idea of the names for these things). I think the proportions are just about right. All that's left is to do some detailing on the cabins such as the cardboard panels on the outside and possibly a life-saver or something. I have been fossicking about for suitable stowage and other tidbits. Got a pretty good collection happening which you will see as the work progresses.
Of course there is also the back of the top deck, the gun platform/sun shade, and the paddle which is proving to be a bit of a challenge. I've got just about everything else I need to finish this off. Will it get done by the weekend? Well, let's see, shall we?
So, without further ado (I have heard someone say this as adieu in the past, but he was a manager of mine so I kept mum about it) here are the latest photos!
Oh, the fun that's going to be had when this s all done! For now, I'll just have to settle for "pew pew" and "toot" noises.
Goodnight, everybody.
Monday, February 21, 2011
Colonial steamer pt. 5
Finally, some photos!
I put some miniatures in place for a better idea of the size of the boat. I've still got a fair bit to go, but there's no rush. Although, I would love to get it on the gaming table sooner rather than later!
I added a fore deck to put the gun on (which I will magnetise) and just be a generally useful place to put miniatures. It sure can fit a lot of them!
And that's about it for now. I'm aiming to have this finished by the end of the weekend, so it's all hands on deck until then!
Wednesday, February 16, 2011
Colonial Steamer pt. 4
Some more pictures. I hope you like them!
So, plans are going well. I have also received some great little items from Eureka and Reviresco to make it a little more authentic: some deck guns, coils of rope, swivel guns, ship wheel, compass and search light, and about 50 rails. I'm also working on some boiler-style doors for the cabins. I'm tossing up whether to cast the basic door I have already made and then detail the duplicates, or just produce duplicates of it from styrene.
I'm going to be detailing the aft cabin next, followed by the Captain's cabin on the top deck. I really, really, can't wait to get this beast on the gaming table!
Monday, February 7, 2011
Colonial steamer pt. 3
Here's some more photos of the first set of cabins/boiler room or whatever the deuce you call it:
Just a bit of a teaser as to what's coming up. It's look a bit tall from what I remember of the original plans...
Just a bit of a teaser as to what's coming up. It's look a bit tall from what I remember of the original plans...
Colonial steamer pt. 2
Here's a bit of an update on the steamer project.
I glued down the decking on the original base, as well as on the extension. This has resulted in a crooked mess but I have cleverly hidden this with the cardboard strip around the outside and some filling with putty and more slivers of cardboard.Measure twice, cut once, and all that.
So I'm still deciding what to name her. But as she will most likely be a Belgian ship, I was thinking Belle Epoque (literally a "beautiful age" of society and culture named in hindsight regarding the period from the end of the Franco-Prussian War to the beginning of WW1), and have her painted up as a ship that has long since passed her glory days.
And on with the pictures:
So, the next steps are:
1) Bottom level of cabins;
2) Middle-deck, pillars to hold it up etc.
3) Top level of navigator's cabin and the passenger/big gun area
4) All manner of knick-knacks and ship parts (just did a quick stop over at Reviresco)
5) A crew, most likely.
So, plenty to go and lots more to come!
Subscribe to:
Comments (Atom)


